Washing machine repair can sound complicated, but inside these devices are very basic.You may then choose: call a repairman or see if you can solve the issue yourself. Since washing machines do so many things, diagnosis can be harder than repair. It is a fairly complex gizmo for a home appliance – with special time cycles running valves, engines switching the water on, turning the shower, draining water and regulating the temperature of the water.
But even the do-it-yourselfer may be diagnosed. It needs only a little patience and a basic mechanical washing machine experience. In this article, we will illustrate how your Samsung Washing Machine Repair in Hyderabad can be solved and identify some fast remedies for common defects.

As discussed, washing machines are complex, but you can take some easy steps to diagnose common washing problems.
Is the washer powered? The primary defensive line for any electrical repair is the genuine hope that it is so straightforward as a loose plug, broken cable or wall outlet. It may be a blown fuse or circuit breaker if all of this is tested. Both can still be a fairly easy repair. But if the machine gets power and doesn’t work, then it’s probably time to know your washing machine more deeply.
The next thing to look at after electricity is the water supply. Knobs may be unintentionally turned or hoses kinked so that rapid examination of these parts can produce a reply. Make sure all water rods are switched on and that all rods without kinks are properly extended. Make sure the button is pushed if the washer has a water saver button.
If the source of energy or water is not problematic, the next logical question may be that the washing machine does not work correctly because it needs to be washed. In the next segment, we will explore how to avoid making a dirty washer with dirty clothes.
Clean the top and door regularly to stop the accumulation of dirt and detergent. Pull lint from the bath after removing the laundry as you wash really linty products. The lint will prevent proper circulation of water and detergent and the soap deposits themselves can cause laundry to smell bad. Fill the tub with water to fix this problem, add 1/2 cup baking soda or 3 cups of white vinegar and then run it through the full wash cycle without washing. If the deposits are very bad, wash inside the tub with a home ammonia and a light detergent solution.
Thoroughly clean and wipe the bath with fluid bleach. A word of caution: thoroughly clean the bath before bleaching. The ammonia and bleach mixture forms a potentially harmful gas called chloramine. This compound can lead to health problems from mild skin irritation to digestive and renal problems.
Finally run the machine through the entire washing cycle until you instal further washing facilities. Hopefully, with these simple steps you can solve your dilemma.
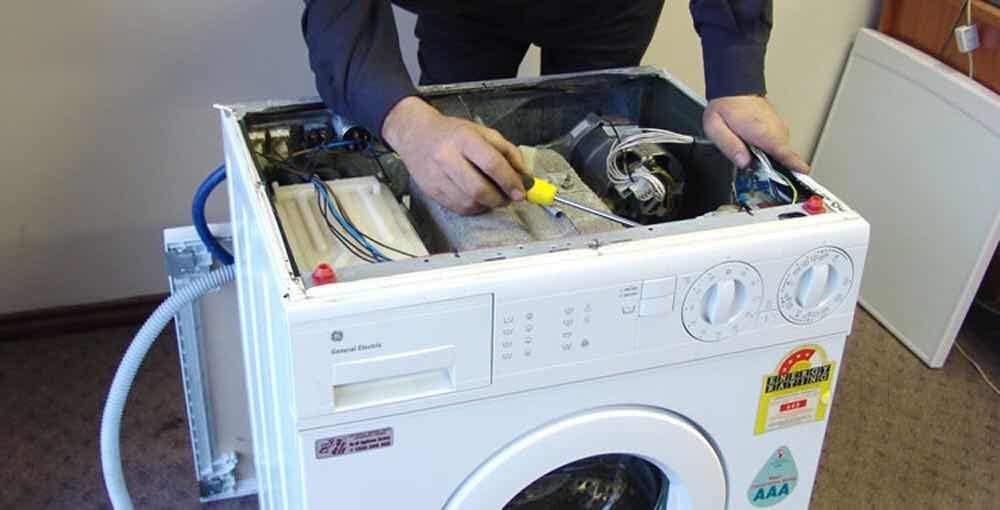
But don’t despair if the problem continues. In the following portion, the dismantling of the washer will be addressed for more extensive repairs.
The washer cabinet typically needs disassembly for most repairs and maintenance. The Whirlpool Washing Machine Repair Hyderabad includes all the electrical components of the washer and the magic. The location varies according to the manufacturer, but normally can be located behind the control panel on the top of the unit. This can be very easy depending on the make and model but please see the manual of the owner to find out how your specific machine can be disassembled properly. Attention: Before disassembly of the cabinet, make sure that the power cord and water flows are disconnected or tip it for operation.

Here are three measures for the disassembly of the simple washer:
Stage 1: To remove the control panel, normally placed on top of the unit, a range of retaining torches must generally be loosened and/or removed. These may be located under a moulding or trim to be removed to see them. The buttons on the control panel are typically friction fit and are pull-out, while others are held by small screws that don’t have heads at the base of the button, like a traditional slotted screw. Loosen the set screws with a screwdriver or Allen clamp and grab the buttons right away.
Stage 2: You will need to cut the retaining screws to remove the service panel. Next, ensure that the unit and the hoses are drained. Tap the washer on the front or side of the unit to access the floor, which is usually accessible and does not have a service panel.
Step 3: Place a stiff-bladed knife in a joint between the top and the side panels to remove the top of the cabinet and give the knife a rap fist. The spring clips should be released to clear the top.


