Hitting your storage cap is a gut-wrenching feeling, so we’re here to help with some tips to free up space on Android! and Strong Manager. Be with us.
We’ve felt that frustration and share your pain. Now it’s time to make some changes, and we are here to help you free up space on Android. There are many ways to clear up the clutter in your handset, but we will focus on the most helpful, easier, and more convenient tips and tricks to free up storage space on Android.
We’ve felt that frustration and share your pain. Now it’s time to make some changes, and we are here to help you free up space on Android. There are many ways to clear up the clutter in your handset, but we will focus on the most helpful, easier, and more convenient tips and tricks to free up storage space on Android.
Use the Manage Storage feature
The stock Settings app has its own section for helping you keep your storage free of unnecessary files. To check this out, go to Settings > Storage > Manage Storage. Keep in mind manufacturers often modify the Settings. We’re making this tutorial using a Pixel device. The process for finding this feature might be different with your phone.

Once on the Manage Storage page, you’ll get suggestions for deleting certain files. These may include duplicates, old screenshots, photos that have already been backed up, unused apps, downloaded files, and more. Simply go through the recommendations to free up storage space on Android. Here’s a step-by-step guide in case you find it easier to understand.
How to use the Manage Storage feature:
Open the Settings app.
Select Storage.
Hit the Manage Storage button.
Go through the recommendations to free up storage on Android.
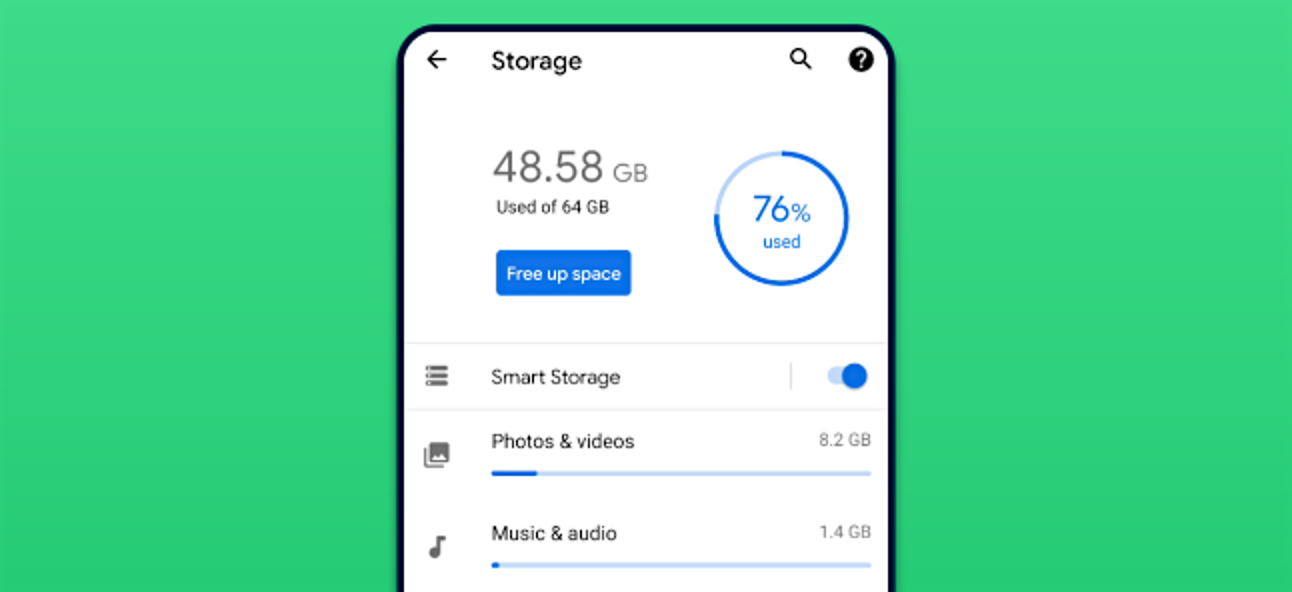
Use Android Smart Storage to free up space on Android
A great secondary feature you might want to take advantage of is Smart Storage. This is also within the Storage sections in the Settings app. Once you go to Settings > Storage, toggle Smart Storage on. This feature will make it so that older photos and videos are automatically deleted if they have already been backed up. You can choose files to be deleted after 30, 60, or 90 days too. Just in case you want to give yourself a little buffer. Here’s the step-by-step guide to make things less confusing!
How to use Smart Storage to delete things automatically:
- Open the Settings app.
- Select Storage.
- Toggle on the Smart Storage feature.
- Tap on the Smart Storage button to edit how often you want backed-up photos and videos removed.
Uninstall apps you don’t need
This is the first thing you should look at when looking to free up storage space on Android. Apps can take up a huge portion of your storage space. Do you really need that 2 GB game you haven’t played in months? Get rid of everything you don’t use!
Delete photos and videos
Photos and videos are likely the next big storage hog. Free up space on Android and get rid of some. Are all those images and clips memories worth keeping down the line? Many probably aren’t. Some of you may be a little too shutter happy and have a bunch of repeated images, too. Go through your gallery and see what is actually worth keeping around. You may already have many of these backed up to the cloud, anyways. Why keep them on your device?
Use a microSD card
Your phone may or may not have a microSD card slot. If you are blessed with one, you can use a microSD card in two ways. The first would be to simply use it as external storage and transfer large files to it. There is another solution many of you will prefer, though.
Some phones support adoptable storage. This means the device could use the microSD card as internal storage. It becomes part of the phone’s space instead of an external addition where you can throw files.
There are some downsides to keep in mind with this process. For starters, the microSD card will only work with that specific phone. You also shouldn’t remove the card once it has been set as adoptable storage. Doing so will trigger a factory data reset. Furthermore, many microSD cards are slow. Get a fast one that can keep up with your device.
How to set microSD card as Android adoptable storage:
- Put the microSD card in your Android phone.
- Open the Settings app.
- Select Storage.
- Tap on the SD card you inserted.
- Hit the menu button and select Storage settings.
- Choose Format as internal.
- Hit Erase and format.
- Hit OK.
- Migrate your data (or choose to do so later).
- You are done!
Take advantage of the cloud to free up space on Android
Cloud services have a lot to offer, especially for those limited in the storage department. Many of these services are free or cost very little money. For example, you can use Google Photos to upload all your images in high quality for free. Just keep in mind unlimited high-quality storage is set to end in June 2021. In addition, services like Google Drive and Dropbox make it super simple to back up all your content. See which option convinces you and take advantage of it.
Those struggling to keep space free on their devices might also have an amazing music collection in there. If you have gigs over gigs of songs, we would advise you to migrate to an online service like YouTube Music or Spotify.
If you are like me, your downloads folder is full of stuff you don’t need. In here, we often find a bunch of files you might have needed months ago for a minute or two, but are no longer relevant. Go ahead and use a file manager to delete old files. Most phones now come with one. If yours doesn’t, then go ahead and get one through the link below.
Clear the cache to free up space on Android
Clearing the cache is not always a good idea to free up space on Android. This is data your phone often needs to operate faster and more efficiently. It can definitely build up, though, and if you are looking to clear some space quickly, cleaning the cache is one quick solution.
Simply go to Settings > Storage. Go into Other apps and go into each app you want to delete the cache for. There will be an option in there to do so.
How to clear cache in Android:
- Open the Settings app.
- Select Storage.
- Go into Other apps.
- Select the app you want to delete cache for.
- Hit Clear cache.
Delete offline areas in Google Maps
Google Maps makes it easy to navigate through your area without using data. Maps can be downloaded for offline use, but this comes at a pretty big cost. Offline maps can take a huge blow to your storage space. I have well over a GB of offline map data.
Simply go to Google Maps, tap on your profile picture, and access the Offline Maps option. You’ll see a list of the areas you’ve downloaded. Hit the 3-dot menu button to the right to see a series of options. Hit Delete to get rid of it. This will definitely free up space on Android.
How to delete offline maps in Google Maps:
- Open Google Maps.
- Tap on your profile picture.
- Select Offline Maps.
- Hit the 3-dot menu next to your downloaded areas.
- Tap on Delete.
Perform a factory data reset
Your best bet might be to start new and perform a factory data reset if all else fails. This will erase everything in your phone and bring it back to the state it was the first time you turned the device on (at least software-wise). Your apps, photos, videos, files, and other content will be gone, so make sure to back up whatever you deem important.
The good news is all unnecessary files will also be gone, giving you a chance to start fresh and better manage your storage space. This is especially helpful if you’ve exhausted all other options and simply don’t know where all your storage space is going.


